Maple Alps

flax

Vegan Parm-Like Topping

RecipesAmanda Walter | Maple Alps5 Comments

If you ask my husband, he will confirm that I am a “spaghetti with my parmesan” type of person. I love toppings. On everything. I also love gravy. But toppings. I like them when they’re generous and basically the main thing. Fried onions? Load ‘em on! Parmesan? I like pasta with my parmesan!

But of course, when you go plant based, or take part in Veganuary, parmesan is no longer an option - or is it? Well, maybe not parmesan in the traditional, stinky-feet smelling sense anyway. I do have a really tasty alternative, however.

This post contains affiliate links

Vegan Parm-Like Topping | www.maplealps.com

The following is a true story: I spent a Christmas only college campus one year with someone who sprinkled ground nuts on their pasta and I was really excited about that. It tasted delicious. Then, a few years later, my dad started putting ground flax seed on everything to up his fibre intake. He would grind his own flax seed and keep it in a little bag. I decided to subscribe to that as well. I figured as well that since I love nutritional yeast flakes on popcorn, that I could start doing that too. Then I saw some vegan parmesan recipes floating around and it had nuts and the yeast flakes in it. I added my ground flax and some onion powder and became a happy camper.

I hesitate to call this a vegan parmesan because it tastes nothing like the smelly cheese, but it sure tastes delicious. I can’t not have this on top of my spaghetti now. It’s also delicious on green beans, and even salad! Seriously, just go to town with it, because it’s so yummy!

There is no reason to think that just because you go on a plant based diet that you will have to give up so much. Instead, you gain so much because you get to experiment with flavours and foods that you would not have normally expected to!

Vegan Parm-Like Topping | www.maplealps.com

Vegan Parm-Like Topping

what you need:

what to do:

Add all ingredients to a food processor and mix until combined well.

Keep mixture in the fridge for about a month.


PRO TIP: Did you know that the tops of parmesan cheese containers fit perfectly onto a mason jar? If you have one, keep it to use for this stuff!

Print This Recipe

Do you love toppings too?


Honey Oat Chia Bread

RecipesAmanda Walter | Maple Alps24 Comments

There are plenty of opinions on using honey as plant-based eaters. We are rebels, though. Bees are crazy amazing and honey is called a superfood - full of nutrients and thought to be immunity-boosting and antibacterial. I love that it can be produced locally as opposed to some of the other natural sweeteners that are imported. On that note, we love local maple syrup as well! 

Someone recently gave us a bottle of honey from their own beehive. How can you say no to a gift like that? Well, you can't. And before you get on me for using [local, gifted] honey and how horrid and unethical it is, just know that you can use agave or maple syrup instead :)  

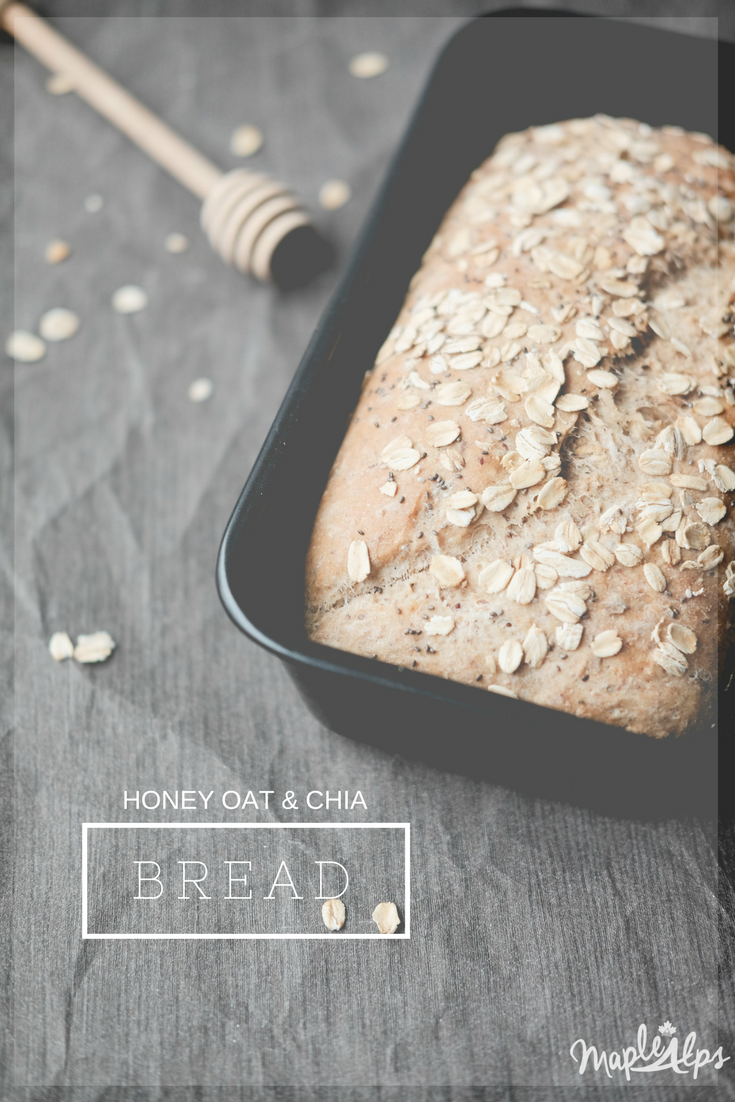
Since we like to eat our own homemade bread, I decided to try honey oat chia bread, and I love what came out! Here is the recipe for our honey oat chia bread!

Honey Oat Chia Bread | www.maplealps.com

I had not had much luck with baking bread in a loaf pan, so that is why I stuck with the super easy artisan bread that I made in my dutch oven, but last week I was inspired to try something new. I hadn't made bread for a bit and my husband really wanted some. The only problem with the bread I usually make was that I prep them the night before to be ready to bake the next day. Of course, I kept forgetting to do that, and when we finally ran out of bread, I knew I needed one to be done that day. So I tried and after a few tries, I finally got it just how I liked it, and am pleased to say that we have a new favourite quick-loaf. 

I also have a loaf pan with 4 cavities, so I am going to try to make mini loaves for neighbours!

It's a perfectly sweet-ish bread that is great for sandwiches and your morning toast fix. 

Related: Tomato Roasted Almond Spread

Honey Oat Chia Bread | www.maplealps.com

Honey Oat Chia Loaf

What You Need:

  • 2 cups warm water

  • 2 teaspoons yeast

  • 1/4 cup honey (or agave or maple syrup)

  • 1/4 cup olive oil

  • 1 cup old fashioned oats

  • 1 teaspoon salt

  • 2 TBSP ground flax

  • 1 TBSP chia seeds

  • 2 cups all-purpose flour

  • 2 1/2 cups whole wheat flour

What to Do:

  1. In a large bowl, mix water, yeast and honey. Let stand for 5 minutes until bubbly.

  2. Mix in olive oil, oats, ground flax and salt

  3. Mix in all-purpose flour.

  4. Mix in whole wheat flour 1/2 cup at a time. You might not need all the flour.

  5. Knead dough for 5 minutes. Dough should be tacky, but too sticky.

  6. Put dough in a greased bowl, cover, and let sit for at least one hour, until doubled.

  7. After it has doubled, gently deflate the dough by pressing your fist into the center of it.

  8. Divide the dough into two and shape into two loaves. Place loaves into greased bread pans. Cover and let rise for 30 minutes.

  9. Preheat oven to 375 degrees about 20 minutes in.

  10. Optional: Just before baking brush loaves with water, and sprinkle with oats and chia seeds.

  11. Place in oven and bake for 40 minutes.

  12. Once baked, allow the bread to rest and cool for about 5 minutes before removing it from the pan and cooling on wire rack.


Do you make your own bread? What's your favourite kind?
Let me know below - I always want to try something new!


Honey Oat Chia Bread | www.maplealps.com

Whole Wheat Artisan Bread with Seeds

RecipesAmanda Walter | Maple Alps36 Comments

With the new year well under way, it seemed a natural thing to go through old blog posts and figure out how I could improve them or what could be changed. I came across the original post for this recipe and decided that it needed a new home and a bit of a facelift. Speaking of new homes, we are loving our new area despite the cold rain that has been drizzling from the skies this last week. Somehow, I imagined January to bring us snow, and instead, the temperatures have been mild and the rainy weather makes me a little sleepy. The forecast says snow next week, but I'm not holding my breath. 

As with every new year, I got the urge to purge (that is kind of catchy, though I imagine I am not the first one to say it...). If you follow along on Instagram, you may have caught wind that I'm streamlining my life; getting rid of unnecessary clutter that has accumulated over the past few months, and creating a better daily routine. I'm also striving toward a more homemade vegan pantry. Every year is more successful than years past, and I'm reminded that intentionality in every area of life is extremely important. I almost feel that I have a hang of it.

But enough about that, and enough rambling. Let's talk bread! 

This post contains affiliate links

Whole Wheat Artisan Bread with Seeds | www.maplealps.com

You already know why I choose to make bread rather than buy it. I've recently added a few new recipes to my repertoire, but I'm re-sharing this tried and true bread that I go back to here and there when I'm feeling too lazy to make our favourite bread. Yes, I get lazy. It only requires one bowl, 5 minutes of my time, and does the rest of the work itself. Can't complain about that! You know I looooove adding all sorts of fun things to my bread, so of course it has all kinds of seeds in it. I'm thinking I should try nuts sometime...Speaking of nuts, this is also delicious with a tomato roasted almond spread. Oh man, I'm getting hungry!

whole wheat artisan bread with seeds (vegan) | www.maplealps.com
 

Whole Wheat Artisan Bread with Seeds

What you need:

  • 2 cups whole wheat flour

  • 2 cups all-purpose flour*

  • 1 tsp active dry yeast

  • 2 tsp sea salt

  • 1/4 cup sunflower seeds**

  • 1/4 cup flax seeds**

  • 1/4 cup pumpkin seeds**

  • 2 1/2 cups warm water

*note: you can substitute all-purpose flour for whole wheat. It works perfectly fine!

**note: I've added three different types of seeds here, but you could really add anything at all! Ground flax is a favourite of mine.

What to do:

1) Mix all the dry ingredients into a large bowl.

2) Add water slowly and mix well. The dough will be quite shaggy (rough-looking dough) when all together - you may not need all the water depending on what kind of flour you use.

3) Cover bowl with plastic wrap, and let it sit on the counter for 12-18 hours.

4) Preheat your oven to 450 F (not for 12 hours, please!). Put a cast iron pot** into the oven (with lid ON) to heat as the temperature rises. Once heated, remove the pot, as well as the lid.***

5) Flour a workspace and your hands and gently remove the dough from the bowl. Roughly shape the dough into a ball and place it inside of the pot. Place the lid on the pot and put it inside the oven.

5) Bake for 30 minutes with the lid on and another 15-20 minutes with the lid removed - until a perfect golden brown.

6) Carefully remove from oven and place on rack to cool completely.

**note: you do not have to use a cast iron pot (dutch oven). ANY oven-safe covered vessel will do, I’ve even read people use a crock pot insert with foil over the top instead of the lid!

***note: if the pot is not hot enough, your dough will stick to the bottom! To avoid this, do not skip this step!


Freezer Friendly: Once cooled, wrap well and freeze right away for a few weeks. To thaw, place on counter overnight.


Shop this post:

 
whole wheat artisan bread with seeds (vegan) | www.maplealps.com
 

What intentional choices are you making this new year? Let me know in the comments below!