Maple Alps

savory

Mujadara (Stovetop and Instant Pot Directions)

RecipesAmanda Walter | Maple AlpsComment

A Middle Eastern preparation, Mujadara is essentially spiced rice and lentil topped with crispy, golden fried onion slices. And, it sure is quite an easy to manage dish, both to assemble and to cook. Enjoy it for a quick lunch (or dinner), or an excellent on-the-go packed meal.

Mujadara | www.maplealps.com

It is an amazing preparation! Not only because it requires easy to find ingredients, but also for the flexibility it offers in the ways you can serve or prepare it! Serve it with plain yogurt, or any other spicy sauce such as Sriracha, hot sauce, etc. This dish is gluten-free, nut-free, and if you skip the yogurt it can very well turn into a dairy-free preparation as well!

Mujadara is one such Lebanese dish that is amazing on so many levels. It is nutritionally balanced owing to the presence of rice and lentils, which are great sources of the vital nutrients carbohydrates and proteins. This whole grain (lentils) is also a great source of fiber, iron, B vitamins (including folate, thiamine, vitamin B6, and pantothenic acid), manganese, phosphorus, copper, potassium, magnesium, and zinc. Phew.. incredible, right?

Mujadara | www.maplealps.com

With such an interesting profile, here is how you can prepare this dish for your family and friends for the weeknight get-together!

Mujadara, which literally translates to “pockmarked” in Arabic, it is one of the few Middle Eastern preparations that is also vegetarian.

Mujadara | www.maplealps.com

Mujadara

what you need:

  • ½ cup dry basmati or long-grain rice

  • 1 tablespoon extra-virgin olive oil

  • 2 bay leaves

  • 2 cloves garlic, minced

  • ½ cup dry brown lentil, rinsed and drained

  • 3 cups water, plus ¼ cup more

  • ½ teaspoon salt, plus a pinch more

  • Oil, for frying

  • 1 large red onion, peeled and sliced

  • ½ tablespoon cumin powder

  • ½ teaspoon black pepper powder

  • 1 tablespoon fresh parsley, chopped or a parsley sprig for garnish


what to do:

  1. Wash, rinse, and drain the rice. Soak it in normal water for about 30 minutes.

  2. In a large pot, heat olive oil on medium flame.

  3. Add the bay leaves and garlic to the oil and cook for about 30 seconds. You will need to stir it constantly.

  4. Stir in the lentils and then pour two cups of water over it. Add ¼ teaspoon salt and bring it to a boil.

  5. Cover with the lid and cook the lentil on simmer until the lentil is half cooked. You will have to stir it occasionally and add more water (about an additional ¼ cup) if you feel that it is drying up.

  6. Meanwhile, heat oil for frying in a small pan.

  7. Deep fry or shallow fry sliced onions on low to medium heat until it turns golden brown in color.

  8. Remove the fried onions onto a dry paper cloth and sprinkle a pinch of salt on it. Lightly mix the salt with the fried onions and keep aside for it to crisp.

  9. Now, add rice to the boiling lentils.

  10. Add the cumin powder, ½ teaspoon salt, black pepper powder, and the remaining water to the lentil and rice mixture.

  11. Bring the water to a boil on medium flame and then cook it covered on simmer until the rice is cooked. You will have to stir it occasionally.

  12. Serve mujadara with fried onions on top. Garnish with parsley and enjoy!

You can also prepare this dish in an instant pot. Simply use overnight soaked brown lentils and cook it along with the rice to save your cooking time!

If you are not a big fan of instant pots, you must be using a gas stove frequently for your daily cooking requirements. To prepare your meals, a gas stove can also be a great choice as it is a fast cooking medium, helps alter the temperature frequently based on the cooking requirements. For effective gas cooking, you must have the best cooking appliances (categorically pots and pans), which will complement your cooking and give a great result. For this, you should check this article on The Daring Kitchen, where you will find a practical purchase guide for some of the best pots and pans available in the market.


Ligia loves experiencing new cultures through foods and travels. Her hobby is experimenting with different cuisines. Read more of her recipes at The Daring Kitchen.

Mujadara | www.maplealps.com

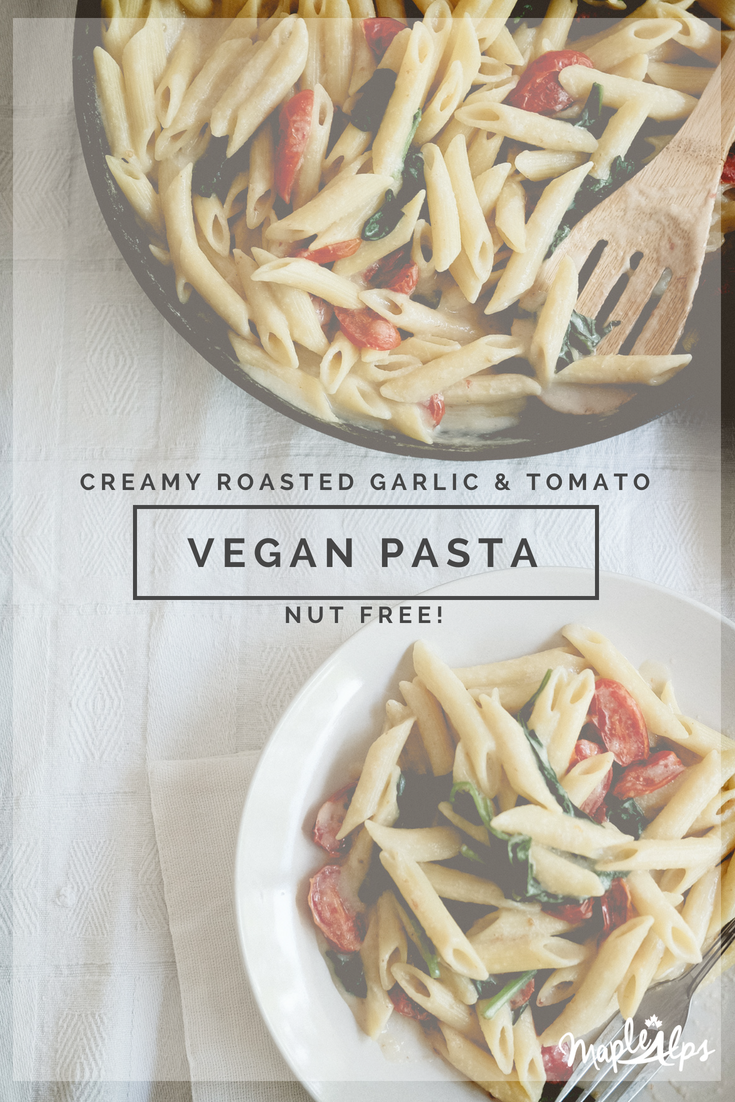
Creamy Roasted Garlic & Tomato Pasta (nut free)

RecipesAmanda Walter | Maple Alps11 Comments

I suppose everyone has a staple that is always in their pantry. When I was growing up, we always had rice. I would eat rice for every meal and I had no qualms about it. Now, it's all about pasta.

We love pasta in this house. It's quick, it's easy, and it's delicious. There are all different varieties - the kind made from black beans or rice or gorbonzo beans. They can be red or green or brown. Pasta is just so much fun! I know many people who would agree with me.

So because of my love for pasta, and becuase of my love for creamy sauces that contain no yucky ingredients, I bring to you: creamy roasted garlic and tomato pasta! It's nut free, but still creamy!

This post contains affiliate links

Creamy Roasted Garlic & Tomato Pasta (nut free) | www.maplealps.com

This dish is the perfect main if you're expecting last-minute company. Seriously. It takes 30 minutes to whip up, but still looks good and impressive on a table. It's perfect and light and tasty! Plus, if there is a nut allergy, no need to look any further!

I love making a full batch of this just for the two of us and packing it up for lunches the next day too. Leftovers are the bomb dot com!

Roasted Garlic & Tomato Pasta | www.maplealps.com

It's all about the sauce! You can use any kind of pasta with it and add any kind of additional vegetables! The tomato and spinach by themselves is fabulous too. Obviously, you can add less pasta if you want a higher sauce to pasta ratio too. I'm super hungry just thinking about it. 

The roasted garlic adds that extra kick of flavour it needs!

I love enjoying this on a warm summer evening out on the deck. Yes! Don't tell me I'm the only one who loves eating outside!

Enjoy!

Roasted Garlic & Tomato Pasta | www.maplealps.com

Creamy Roasted Garlic & Tomato Pasta

Makes about 8 servings

what you need:

  • 1 bulb (yes the whole bulb!) garlic

  • 1 large onion, sliced

  • 16 ounces (1 lb) pasta of your choice

  • Olive oil

  • 2 tsp sea salt

  • Pinch sea salt

  • 3 TBSP arrowroot powder

  • 3 TBSP nutritional yeast flakes

  • 2 ½ cups unsweetened plain non-dairy milk

  • 2 cups grape tomatoes, halved

  • 4 cups fresh spinach

what to do:

  1. Preheat the oven to 400 degrees F.

  2. Clean the outside layer of the garlic bulb, keeping the whole thing intact. Cut the top off the bulb, and brush the exposed garlic with olive oil. Roast entire bulb for 30 minutes.

  3. Wash and halve the tomatoes and place them on a baking tray. Toss with a bit of olive oil and a pinch of salt and add them to the oven to roast for 20 minutes.

  4. While the garlic and tomatoes are roasting, cook pasta and set aside.

  5. Once the garlic and tomatoes are finished, set aside.

  6. Prepare the sauce by adding onions to a large saucepan on low-medium heat. Begin cooking the onions, adding a pinch of salt. Cook until soft.

  7. Add onions, roasted garlic, almond milk, 2 tsp sea salt, arrowroot powder, and nutritional yeast flakes to a high speed blender.

  8. Blend until smooth.

  9. Add mixture back to saucepan and slowly bring it to a simmer.

  10. Add the spinach to the mixture, cooking until wilted. Then add the pasta. To finish, stir in the roasted tomatoes.

  11. Serve right away. Keep leftovers in an airtight container up to 3 days - though it won’t likely last that long!


Creamy Roasted Garlic & Tomato Pasta (nut free) | www.maplealps.com

Vegan Potato & Spinach Pierogies

RecipesAmanda Walter | Maple Alps22 Comments

Can I just start off by saying that July is almost over? I will just let that sink in for a bit. I do not know where the time has gone! Perhaps it's a getting older thing, but days and weeks, months and years are just flying by lately!

Alright, back to right now. After working on this recipe a few times, I finally deemed it ready to share with all of you. Ready for a really good pierogi? 

Delicious vegan potato and spinach stuffed perogies!

One thing I was concerned about giving up once becoming vegan was pierogies. I love a good buttery pierogie. The kind filled with potato and cheese and topped with sour cream. Oh my. Yum! I have seriously alway loved them, and who wouldn't? Seriously?

My fears quickly vanished once I whipped up these puppies though!

Vegan potato and spinach pierogies from Maple Alps

To be honest, once I popped one into my mouth, I didn't even realize the cheese was missing - these were so flavourful, and the texture was really great, even though there was no sour cream or butter in the dough. To make it even better, I didn't even feel guilty as I munched on these! Granted, I don't eat much, but still!

Related: Vegan Sour Cream

Vegan potato and spinach pierogies from Maple Alps

Sure, they were quite the process, but they didn't take eternally long to make, and it really was worth it. The best part is that these freeze extremely well, so making a lot at one time is possible and saves you time and energy on a rainy day (not to mention, gives added joy). Of course, if your family eats as many as mine does, you may not have any left to offer to the freezing process. They're super good with vegan sour cream - whether you make it (recipe here), or buy it. And don't forget the caramelized onions. Mushroom lovers can add those, but I personally stay as far away from mushrooms as I can.

Vegan potato and spinach pierogies from Maple Alps

Vegan Spinach & Potato Filled Pierogies

For the Filling:

  • 3 cups Russet Potatoes, diced

  • 2 TBSP Nutritional Yeast Flakes

  • 1 TBSP Earth Balance (optional)

  • 2 TBSP Non Dairy Milk (I used almond)

  • Sprig of Rosemary, finely chopped (optional)

  • ¼ cup Fresh Spinach, chopped

  • ½ tsp Sea Salt

For the Dough:

  • 3 C All-Purpose Flour (plus some for dusting)

  • 1/2 tsp Sea Salt

  • 1 Cup Water

  • 2 TBSP Olive Oil

what to do:

1) Bring pot of water to boil and put potatoes in to cook for about ten minutes


2) While potatoes are cooking, make the dough by mixing the flour and salt together. Then add water and olive oil and fold until combined


3) Knead on a lightly floured surface until the dough becomes slightly sticky (not too sticky) and elastic. Divide the dough in two pieces, wrap in plastic and place in refrigerator. 


4) Once potatoes are tender, drain, and add all ingredients to pot. Mash until smooth. Set aside.


5) On a very lightly floured surface roll out one ball of dough until it is about 1/16” thick. Use a 3 ½" - 4” round cookie cutter and cut out rounds of dough.


6) Place a good amount (a bit less than a TBSP) of filling in the center of cut dough. wet the tip of your finger with water and dab along half of the circle. Fold dough over, gently pressing and sealing the pierogie. 


7) Place on lightly floured cookie sheet. If you wish to freeze them put them between sheets of wax paper to avoid sticking.


8) If cooking right away, place finished pierogie in boiling water. Cook until floating (about 3 minutes) and remove. Do not overcook or else they will fall apart. 


Optional: After boiling, fry pierogies in pan with a little bit of oil or earth balance till brown.  

Serve with vegan sour cream and caramelized onions - whatever your heart desires!


Are you as much a pierogi fan as I am? How is your favourite way of eating pierogies? Let me know!

Trying these out? I want to know how it turns out! I will always find you when you use #MapleAlps!


Delicious vegan potato and spinach stuffed perogies! | www.maplealps.com

The Most Delicious Vegan Soft Pretzel

RecipesAmanda Walter | Maple Alps25 Comments

The past few weeks, I've been thinking a lot about the time I spent abroad. Let's face it, I'm still abroad, and I still experience things I haven't before, but I was specifically thinking about my time in Europe. It was a grand time. Food-wise, a highlight of mine was the amazing soft pretzels I could get pretty much everywhere. They were as big as my head, and delicious. When I got home, I made some for myself, but a few days ago, I really hit the jackpot when I decided to play around with the recipe some more. 

The most delicious vegan soft pretzels you'll ever make, sprinkled with pink himalayan sea salt! #MapleAlps #Vegan

I had some Earth Balance left over from my cupcake making days, so I figured, why not? 

The result was the softest, buttery, delicious pretzel to come out of my oven to date. I decided to share with the rest of you - because I'm really nice like that. 

Maple Alps Vegan Soft Pretzels

I always thought making pretzels would be a lot more complicated, but such is not the case! I remember the first time I tried a soft pretzel. I also remember that there were none left the next day. Seriously, every time I've made them in the past, those lucky enough to nab one, scarf it down pretty quickly. Imagine my surprise then when these turned out better that the former attempts. These are not as big as my head, but the flavour sure is!

Maple Alps Vegan Soft Pretzels

The secret to that beautiful brown pretzel is baking soda - baked on a baking sheet and then added to the bubbly pot of boiling pretzels. Mhm. Without it, it is just not the same. 

Anyway, enough from me. I bet you are drooling as much as I am ... ;-)

Maple Alps Vegan Soft Pretzels

The Most Delicious Vegan Soft Pretzel

What You Need:

  • 4 cups All Purpose Flour

  • 1 ½  cups Warm Water

  • 2 ¼  tsp Active Dry Yeast

  • 1 TBSP Organic Cane Sugar

  • 2 tsp Sea Salt

  • 4 TBSP Earth Balance

  • Olive Oil  

  • 2/3 cups Baking Soda

  • 10 cups water

  • Coarse Pink Himalayan Sea Salt

What to Do:

1) Mix warm water, yeast, sugar and salt in large bowl. Let sit 5 minutes till foamy

2) Add melted vegan butter. Stir in flour one cup at a time.
 
3) Knead on counter until elastic dough forms. 

4) Grease bowl and let rise 1 hour.

5) (Baking Totally Optional) Twenty minutes before dough is done rising, spread baking soda on baking pan lined with parchment. Bake in oven at 300 degrees F until ready to boil pretzels.

6) Once dough has risen, divide it into 8 equal parts. To twist pretzel into shape, roll the dough into long ropes. Hold at each end making a U shape, create a twist, and press ends down. 

7) Boil water. Carefully add the baking soda. 

8) Gently put pretzels in boiling water and let them "bathe" for 30 seconds. Put pretzels on parchment lined pan. Sprinkle with coarse pink himalayan sea salt.

9) Bake in oven at 450 degrees F for 10-12 minutes, until perfectly golden brown!

10) Allow to cool and enjoy either plain, or with some dipping sauce!


Do you love soft pretzels as much as I do?

Going to be trying these out? I want to know how it turns out! I will always find you when you use #MapleAlps!


The most delicious vegan soft pretzels you'll ever make, sprinkled with pink himalayan sea salt! #MapleAlps #Vegan

Juicy Smoked Chickpea Burger (vegan with gluten free options)

RecipesAmanda Walter | Maple Alps22 Comments

It’s pretty much summer, and with summer comes my desire to be anywhere but the kitchen. It’s too hot to have the oven on and I would much rather be outside. However, even in summer, my husband appreciates warm meals (unlike me, who could just live off of smoothies, salads and popsicles all summer).

Since I prefer minimal time in the hot kitchen on hot days, I have been getting creative with summer meals. Burgers have always been a favourite, so it was only natural I figure out some ways to make a good patty. There were several versions I enjoyed, and I'll share the chickpea version with you today!

Juicy & Delicious Smokey Chickpea Burgers. #Vegan and #GlutenFree. So great and easy to make! A definite winner :D

When it comes to vegan burgers, I’ve had really good ones and really bad ones. One of the really good ones occurred when we went out to eat with some friends a few months ago. It was so delicious, and I don’t even know what it was made of. All I knew, was that it had this perfect smokey taste and just the right amount of BBQ sauce. It was on my mind for days, and I had to reinvent it.

Juicy Smoked Chickpea Burger (vegan with gluten free options)

On a side note, we've been clearing out our cupboards getting ready for a busy summer and a move, so I just went right there. I had a can of chickpeas, and I decided that was what my burger was going to be made of. 

By the way, I do enjoy making my beans from scratch now though!

Related: How to Cook Garbanzo Beans 3 Ways (Chickpeas)

Juicy Smoked Chickpea Burger (vegan with gluten free options)

It took several tries. I learned very quickly that I had to make sure it wouldn't crumble, and since we don't use eggs, it was a bit of a challenge with attempts I'd made in the past. I figured beans would help a lot with that, and was I ever right! With the oats and veggies in there, the texture was great - and the BBQ sauce....oh, the BBQ sauce...

Topped with some fried onion, a slice of vegan "cheese," and some fresh veggies, it's seriously delicious. 

The best part about these, are that they're light, and don't leave us feeling groggy and gross.

Juicy Smoked Chickpea Burger (vegan with gluten free options)

Juicy Smoked Chickpea Burger

what you need:

  • 15 oz. can chickpeas (or 1 1/2 cups if using cooked), drained and rinsed

  • Half Cup Rolled Oats

  • 3 TBSP BBQ Sauce

  • ½ Onion, Finely Diced

  • 1 Small Zucchini, Grated and dried well

  • ½ Small Carrot, Grated

  • About 1 tsp each: Salt, Cumin, Smoked Paprika

  • 3 Cloves Garlic, Minced

  • 2 tsp Olive Oil

what to do:

1) If using canned beans, drain and rinse well. Mash coarsely in a bowl with a fork. 

2) Add the rest of your ingredients and seasonings and mix very well. Your mixture should not be too wet, but wet enough to form. 

3) Shape the patties in your hand and lightly brown in heated fry pan. 

4) Serve as a plain patty, or put in a bun (gluten-free if needed) and top with your favourite burger toppings (we love vegan cheese, lettuce, tomato, and fried onions). Enjoy!

Note: These freeze and reheat well. 


What is your favourite thing to eat in the summer?

Let me know if you try out this burger by using the hashtag #MapleAlps! I love seeing what everyone comes up with! 


Pin this recipe:

Juicy & Delicious Smokey Chickpea Burgers. #Vegan and #GlutenFree. So great and easy to make! A definite winner :D