Maple Alps

Finding the Time

Ask Amanda, BlogAmanda Walter | Maple Alps4 Comments
Ask Amanda: Finding the Time and Balance to Blog, Teach, and Have a Life | www.maplealps.com
 

Question: How do you find time to be a wife, teacher and blogger? Is that even possible? Can we have a glimpse into a day in the life of Amanda?


Honestly, I ask myself this question all of the time, so it is no wonder that it is the most common question I get! I wish I could say that I teach during the day and blog at night, but it really is not that simple. Teaching and blogging both require so much behind-the-scenes work and sometimes I wonder if I can manage it all! 


Learning how to say no has been the one thing that has helped me accomplish so much in these areas of my life. Choosing my priorities carefully has been important, as has to accept that both teaching and blogging are passions of mine.


We actually have more time than we think. A lot can be accomplished in 24 hours (including getting 7-8 hours of sleep!) when the time is used carefully and intentionally without distractions.


Blogging tasks are usually done over the weekend, and sometimes in the evening if I have some spare time. Long weekends and breaks are also used productively for those tasks (for example, this last summer, I queued 4 months worth of content). During periods that I have less time for blogging, I like to repurpose or update content so that I’m still keeping things fresh and up-to-date. Sometimes I’ll perfect a recipe. All of that being said, my teaching tasks always come first. Thankfully, I’ve got a knack for being productive and motivated most of the time. We all have days.


As for being a wife, it is sometimes hard to be intentional about that. Last year, my husband and I struggled to find enough time to even just sit down and talk (both for fun and for important things like the budget). The pastor/teacher duo is not always the best since his work starts getting even busier once I get home. There are always constantly meetings in the evenings between the two of us, and I try to go to bed early most nights to ensure I have enough energy for the next day. Also to ensure my immune system stays functioning.


We have started setting aside one evening a week for a “date night,” which really just means we spend the evening together. It could be playing board games, cooking together, or going out to eat, but we make sure to connect deeper than just a passing “hey!” We used to joke every Sunday, “see you next week!” We would literally not see each other for more than a few minutes a day depending on the week, so I hope to not have that as a reality this next year. I should also mention that my husband is fantastic at sharing chores around the house, which makes keeping things tidy much easier!


Finding time for personal and spiritual and professional growth is most important for me on top of all of the other things I do. One way I make sure to meet all of these needs is getting up extra early by 4:30 am to ensure I have time to pray and read my Bible. Another thing I like to do is to use my 40-minute driving commute to listen to audiobooks and podcasts. Sometimes on my way home, I'll call friends or family.


Exercising is another thing I try to find time for. Since exercising at ridiculous times in the morning is not for me, I have in the past chosen  to do it after I come home. There has never been a time where it hasn't perked me up and made me feel good - even if it's a short 30-minute walk around the neighbourhood, even if the motivation is hard to find after a long day sometimes.


It's all about using time wisely. I take one day per week to rest and recuperate and to focus on my relationship with God and others - one day where I do not do any work at all! It sounds counterproductive, but it truly is our original design and is a blessing!


If you struggle with making time for the things that matter for you, I highly recommend printing off or buying a weekly timetable and marking off all of the things you have to be at or do - including sleeping and eating! You may be surprised at the time you have left off, and the things you can fill those slots in with! Or with what you can shift to make a manageable timetable!


What are some of the ways you manage your time with tasks?


If you have a question, feel free to leave one below for a future segment of "Ask Amanda!"


3 Healthy & Energizing Smoothie Recipes

RecipesAmanda Walter | Maple Alps4 Comments

Smoothies are a quick and easy way to get a tasty fruit fix, and I make them as often as possible. I love to start my day with one, and when I have friends over they’re the perfect alternative to coffee on a sunny day. My family loves them too, and I find that smoothies are one of the best ways to get kids the vitamins and antioxidants that they need.

I’m always looking for new recipes that are vegan-friendly, healthy and delicious, and the three recipes in this post tick all those boxes. They’re also great energy-boosters, thanks to the matcha green tea powder.

If you haven’t already heard about matcha tea, let me tell you why I love it. It’s known to increase energy levels and improve concentration, so it’s great for getting me through a busy day. It’s also full of antioxidants which help to boost the immune system and protect against diseases. It can even give your metabolism a boost which helps with weight loss too.

Matcha is the perfect smoothie ingredient and I love the long-lasting boost that it gives me - especially when I have a busy day ahead. Make sure you get high-quality matcha though as this ensures it's got the maximum health benefits and non-bitter taste. I recommend Evergreen Matcha, as they source their premium grade matcha from sustainable farms in Japan so it's packed with the maximum goodness.

For the following recipes, simply add all the ingredients to your blender, whizz up, and enjoy.

3 Healthy & Energizing Smoothie Recipes | www.maplealps.com


Energy-boosting strawberry, banana, and matcha smoothie

This smoothie is perfect for breakfast at the start of a busy day. The fruits not only taste delicious but are also packed with mood-improving vitamins and nutrients, and the matcha tea will give you all the energy you need to take on anything.


What you need:

●      2 cups strawberries (fresh or frozen, but if frozen thaw them first)

●      1 banana

●      1 kiwi, peeled

●      2 scoops vanilla protein powder

●      ½ cup plain low-fat yogurt or ½ cup unsweetened vanilla almond milk

●      2 tsp matcha


Boost Your Immune System with this Ginger Matcha Smoothie

This smoothie is packed full of tasty goodness. The matcha is an incredible source of antioxidants, and the ginger and fresh orange gives your body some vitamins and a kick to help fight off any this drink a lovely warming finish which helps boost your immune system.


What you need:

●      1 tsp matcha

●      1 lime, juiced

●      1 cup orange juice, freshly squeezed

●      1 tbsp chia seeds

●      2 tbsp fresh ginger, grated


Note: if you don’t like the spiciness of the ginger, simply leave it out!


Antioxidant-rich cacao and matcha smoothie

Did you know that raw, organic cacao is full of antioxidants? It’s a true superfood, and it has all of the calcium, iron, and magnesium that your body needs. It also has over 40x the antioxidants found in blueberries, so cacao and matcha are a health-boosting dream team.


This smoothie is delicious as an afternoon pick-me-up and is perfect if you need an energy boost. And, drinking this smoothie regularly can promote weight loss and will help protect against diseases.


What you need:

●      1 ½ cups almond milk

●      1 tbsp cacao powder

●      ½ tbsp matcha

●      2 tsp maca powder


Note: if you want to increase the iron content of this smoothie you can add a handful of spinach. Or, if you want to even out the strong cacao taste with some extra sweetness, blend in ½ tablespoon of maple syrup.

 
3 Healthy & Energizing Smoothie Recipes | www.maplealps.com


Erin Young is a health writer, tea expert and owner of two tea brands: Evergreen Matcha in the USA and Zen Green Tea Matcha in Australia. She partners with sustainable tea farms based in Kyoto (Japan) to ensure the best possible quality matcha green tea powder.


Zen Green Tea: Facebook & Instagram


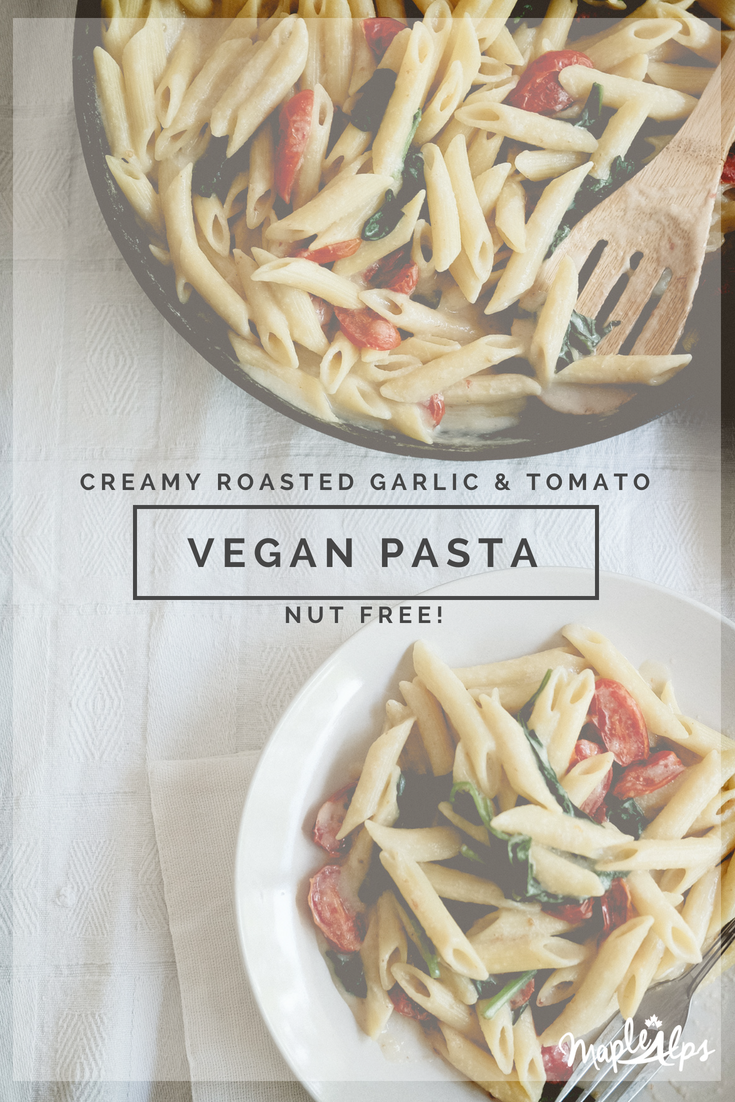
Creamy Roasted Garlic & Tomato Pasta (nut free)

RecipesAmanda Walter | Maple Alps11 Comments

I suppose everyone has a staple that is always in their pantry. When I was growing up, we always had rice. I would eat rice for every meal and I had no qualms about it. Now, it's all about pasta.

We love pasta in this house. It's quick, it's easy, and it's delicious. There are all different varieties - the kind made from black beans or rice or gorbonzo beans. They can be red or green or brown. Pasta is just so much fun! I know many people who would agree with me.

So because of my love for pasta, and becuase of my love for creamy sauces that contain no yucky ingredients, I bring to you: creamy roasted garlic and tomato pasta! It's nut free, but still creamy!

This post contains affiliate links

Creamy Roasted Garlic & Tomato Pasta (nut free) | www.maplealps.com

This dish is the perfect main if you're expecting last-minute company. Seriously. It takes 30 minutes to whip up, but still looks good and impressive on a table. It's perfect and light and tasty! Plus, if there is a nut allergy, no need to look any further!

I love making a full batch of this just for the two of us and packing it up for lunches the next day too. Leftovers are the bomb dot com!

Roasted Garlic & Tomato Pasta | www.maplealps.com

It's all about the sauce! You can use any kind of pasta with it and add any kind of additional vegetables! The tomato and spinach by themselves is fabulous too. Obviously, you can add less pasta if you want a higher sauce to pasta ratio too. I'm super hungry just thinking about it. 

The roasted garlic adds that extra kick of flavour it needs!

I love enjoying this on a warm summer evening out on the deck. Yes! Don't tell me I'm the only one who loves eating outside!

Enjoy!

Roasted Garlic & Tomato Pasta | www.maplealps.com

Creamy Roasted Garlic & Tomato Pasta

Serves: Between 6 and 8 People Prep: 40 Minutes

Makes about 8 servings

what you need:

  • 1 bulb (yes the whole bulb!) garlic

  • 1 large onion, sliced

  • 16 ounces (1 lb) pasta of your choice

  • Olive oil

  • 2 tsp sea salt

  • Pinch sea salt

  • 3 TBSP arrowroot powder

  • 3 TBSP nutritional yeast flakes

  • 2 ½ cups unsweetened plain non-dairy milk

  • 2 cups grape tomatoes, halved

  • 4 cups fresh spinach

what to do:

  1. Preheat the oven to 400 degrees F.

  2. Clean the outside layer of the garlic bulb, keeping the whole thing intact. Cut the top off the bulb, and brush the exposed garlic with olive oil. Roast entire bulb for 30 minutes.

  3. Wash and halve the tomatoes and place them on a baking tray. Toss with a bit of olive oil and a pinch of salt and add them to the oven to roast for 20 minutes.

  4. While the garlic and tomatoes are roasting, cook pasta and set aside.

  5. Once the garlic and tomatoes are finished, set aside.

  6. Prepare the sauce by adding onions to a large saucepan on low-medium heat. Begin cooking the onions, adding a pinch of salt. Cook until soft.

  7. Add onions, roasted garlic, almond milk, 2 tsp sea salt, arrowroot powder, and nutritional yeast flakes to a high speed blender.

  8. Blend until smooth.

  9. Add mixture back to saucepan and slowly bring it to a simmer.

  10. Add the spinach to the mixture, cooking until wilted. Then add the pasta. To finish, stir in the roasted tomatoes.

  11. Serve right away. Keep leftovers in an airtight container up to 3 days - though it won’t likely last that long!


Creamy Roasted Garlic & Tomato Pasta (nut free) | www.maplealps.com

So You Want to be More Minimalistic

LifestyleAmanda Walter | Maple Alps3 Comments

Minimalism is something I’ve been working at for a few years now. I feel that I’ve always had some kind of craving to have less and to be surrounded and burdened by less. Even when I was much younger, I enjoyed throwing things out and organizing things, but it got to the point where I would get rid of things, but then accumulate more. It got harder and harder to let go of things. As I’ve mentioned in other posts before, it took going abroad for me to realize that I really don’t need stuff. I was perfectly content and well cared for with only 2 suitcases worth of things, and even then I didn’t use every item. Just over a year ago, I finished reading the life-changing magic of tidying up - and it was truly life-changing (I talked about it here). It got me re-energized to declutter and reclaim a full life - which was ironically not full of things!

It came down to choosing what brought me joy. I’ve had several requests to talk about some minimalist living tips, and so I’m sharing the steps that helped me!

So You Want to be More Minimalistic | www.maplealps.com


Envision Your Minimalist Life

Why do you want to live a more minimalistic life? What does your minimalist lifestyle look for you? What do you want to do in your everyday life? Write it down and consider it your “why.” Here are some ideas:

  • I will come home to a tidy home so that I have time to relax after work and pursue creative hobbies.

  • I will enjoy a bubble bath in the middle of the week just because.

  • I won't trip over things on the floor anymore.

  • I won't spend hours each weekend cleaning.

  • I will have a clear mind that is a result of a clear living space.

  • I will not be tied to materialistic things.

Write your list. Remember these things as you go through your next steps:


Say Goodbye to Your Unnecessary Things

My ultimate decluttering guide will help you best with this. I will direct you there rather than write it all out again. It’s important to let go of stuff that is just stuff. Keep what really brings you joy. The guide goes through all the areas of your house and just helps you get an idea of what you really should simplify. Find it here.


Quality over Quantity

Even though we are finished (for now) with school, my husband and I still have this poor student mentality. At the beginning, we would always choose what we perceived to be more affordable, just to find that later it would fall apart, or we just really didn’t like it. Seriously, never buy a bookshelf from Walmart. Haha. In the end, it was cheaper to choose the quality items we enjoyed right off the bat. It eliminated buying multiples as well. Quality will last and is worth the initial higher cost.


Choose to keep items that bring you joy!


Realize the fragility of Life

I know this sounds extremely morbid, but you will probably die someday. Do you really want to spend your days unhappy and surrounded by things that bring your life no joy? I sure don’t. I also don’t want to leave my junk for my children to clean up. I would rather leave a legacy of time they spent with me rather than the things I had.


Don’t Try to Do it All At Once

Step-by-step, friends! The decluttering process alone can take up to 6 months. You’ll get there if you keep at your convictions and chip away bit by bit.


Be Mindful

Think about the value that each of your curated items brings to you. This goes for everything from the physical things you can touch, to the apps on your phone and the emails you sscribe to. Everything should have a purpose and add to your experience. in some capacity. Of course, there will be things you have to keep that aren't necessarily too exciting, but reduce what you can.


Some Other Things to Consider Simplifying:


What are some of the ways you embrace a more minimalistic lifestyle?


Mango Swirl Ice Cream (vegan)

RecipesAmanda Walter | Maple Alps4 Comments

Going for ice cream is one of those iconic things about Summer break. Strolling down the street with your little cone or sitting and enjoying some company and views is part of what Summer brings. Thankfully, there are more and more dairy-free options being offered, but depending on where you are, they can be hard to find - and expensive when you do find them.

Thankfully, I don’t have to go out to enjoy a delicious cone of ice cream, and I don’t have to spend $5 or more on a pint in the grocery store. I can just make it in my kitchen. It does require some planning and waiting, but it is all worth it in the end!

Affiliate links are used in this post.

Mango Swirl Ice Cream (vegan) | www.maplealps.com

Earlier this summer I shared my chocolate chai ice cream recipe, but today I have something fruity for you for when you want to use your fresh produce (or even the frozen stuff in your freezer). 

I decided on mango because who doesn't love a good juicy mango? I could seriously eat mangos all summer long and never et tired of them. In fact, I do! :)

Yes, you will need an ice cream maker for this recipe. I'm hoping to add some churn-free ice creams to my index in the future. The good news is that you can get a relatively inexpensive ice cream maker and it will work beautifully. Mine is a simple one with a base that freezes and an electronic churn and I love it! Only paid $30 for it brand new a few years ago (check out Amazon for one).

Mango Swirl Ice Cream (vegan) | www.maplealps.com

The swirl is the most fun part of this whole thing. Half of the swirl mixture is added to the end to make the effect - and adds more fun fruity flavour!

My husband's eyes opened very wide in delight when he tasted this, so I counted this recipe a success.

Mango Swirl Ice Cream (vegan) | www.maplealps.com

Mango Swirl Ice Cream

Makes: About 8 Servings Prep: 6 Hours
 

What you need:

For the Mango Swirl:

  • 2 cups mango'

  • 2 TBSP organic cane sugar

For the Cream Base:

  • 2 cans full fat coconut milk

  • 2 TBSP arrowroot powder

  • 2 tsp vanilla extract

  • 4 TBSP maple syrup

  • 1/4 tsp sea salt


What to do:

  1. Mix all of the ice cream ingredients (to avoid clumps, you can do this in a blender, or dissolve the arrowroot powder into a small, separate amount of coconut milk) into a small pot on medium heat. Do no let it boil, but allow it to cook and thicken - about 5-8 minutes or so.

  2. Cool and then chill in the fridge for at least 5 hours.

  3. While the cream base chills, make the swirl by adding the mango and cane sugar to a small pot. Cook on low heat and constantly stir as the fruit softens.

  4. Once the fruit no can no longer maintain its shape, use an immersion blender to puree it until it becomes a thick sauce (feel free to leave chunks if that is your cup of tea). Set aside and allow to cool.

  5. Once completely chilled, put the mixture into your ice cream maker. Churn according to manufacturer's directions.

  6. As the mixture becomes thicker, like soft serve, start to slowly pour in about half of the mixture.

  7. Ladle the finished ice cream into a container. Scoop the rest of the mango swirl in three sections along the top and use a bread knife to swirl it in.

  8. Freeze a few more hours and then scoop and enjoy! 


Do you have an ice cream churn to enjoy during the Summer?


Mango Swirl Ice Cream (vegan) | www.maplealps.com